| Routing: Pages and Layouts | 您所在的位置:网站首页 › navigate between pages learn nextjs › Routing: Pages and Layouts |
Routing: Pages and Layouts
|
Pages and Layouts
We recommend reading the Routing Fundamentals and Defining Routes pages before continuing. The App Router inside Next.js 13 introduced new file conventions to easily create pages, shared layouts, and templates. This page will guide you through how to use these special files in your Next.js application. PagesA page is UI that is unique to a route. You can define pages by exporting a component from a page.js file. Use nested folders to define a route and a page.js file to make the route publicly accessible. Create your first page by adding a page.js file inside the app directory: 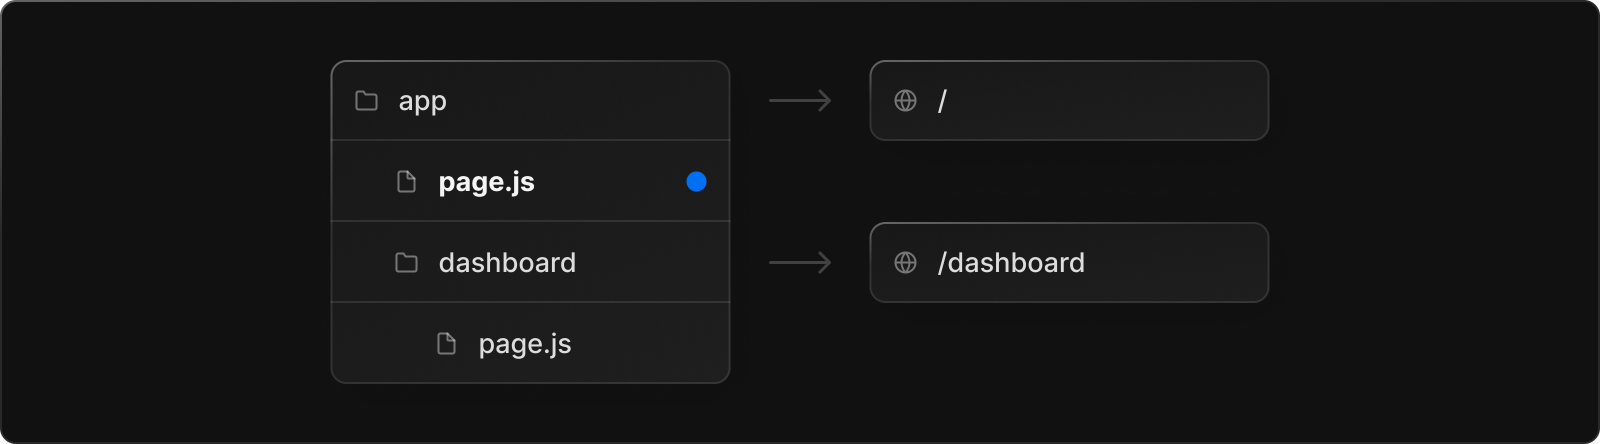 app/page.js// `app/page.js` is the UI for the root `/` URL
export default function Page() {
return Hello, Next.js!;
}
app/page.js// `app/page.js` is the UI for the root `/` URL
export default function Page() {
return Hello, Next.js!;
}
Good to know: A page is always the leaf of the route subtree. .js, .jsx, or .tsx file extensions can be used for Pages. A page.js file is required to make a route segment publicly accessible. Pages are Server Components by default but can be set to a Client Component. Pages can fetch data. View the Data Fetching section for more information. LayoutsA layout is UI that is shared between multiple pages. On navigation, layouts preserve state, remain interactive, and do not re-render. Layouts can also be nested. You can define a layout by default exporting a React component from a layout.js file. The component should accept a children prop that will be populated with a child layout (if it exists) or a child page during rendering. 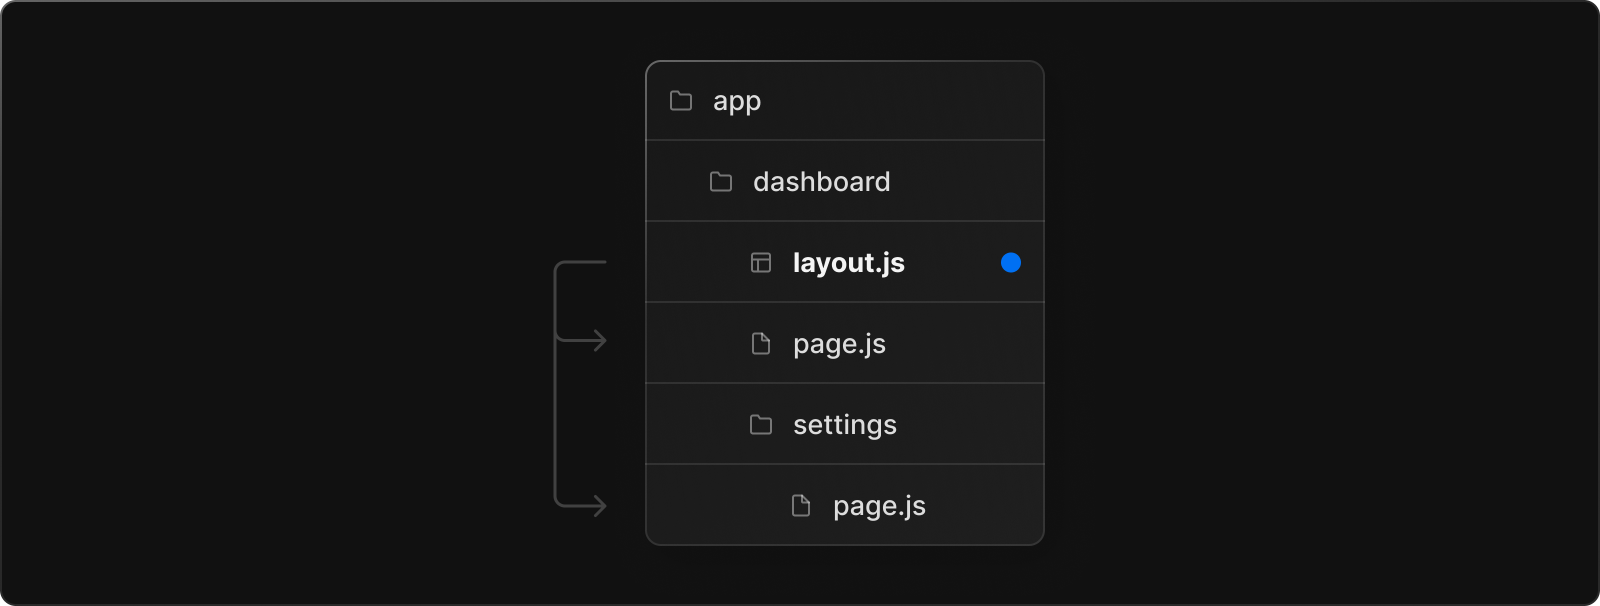 app/dashboard/layout.tsxexport default function DashboardLayout({
children, // will be a page or nested layout
}: {
children: React.ReactNode,
}) {
return (
{/* Include shared UI here e.g. a header or sidebar */}
{children}
);
}
app/dashboard/layout.tsxexport default function DashboardLayout({
children, // will be a page or nested layout
}: {
children: React.ReactNode,
}) {
return (
{/* Include shared UI here e.g. a header or sidebar */}
{children}
);
}
Good to know: The top-most layout is called the Root Layout. This required layout is shared across all pages in an application. Root layouts must contain html and body tags. Any route segment can optionally define its own Layout. These layouts will be shared across all pages in that segment. Layouts in a route are nested by default. Each parent layout wraps child layouts below it using the React children prop. You can use Route Groups to opt specific route segments in and out of shared layouts. Layouts are Server Components by default but can be set to a Client Component. Layouts can fetch data. View the Data Fetching section for more information. Passing data between a parent layout and its children is not possible. However, you can fetch the same data in a route more than once, and React will automatically dedupe the requests without affecting performance. .js, .jsx, or .tsx file extensions can be used for Layouts. A layout.js and page.js file can be defined in the same folder. The layout will wrap the page. Root Layout (Required)The root layout is defined at the top level of the app directory and applies to all routes. This layout enables you to modify the initial HTML returned from the server. app/layout.tsxexport default function RootLayout({ children }: { children: React.ReactNode; }) { return ( {children} ); }Good to know: The app directory must include a root layout. The root layout must define and tags since Next.js does not automatically create them. You can use the built-in SEO support to manage HTML elements, for example, the element. You can use route groups to create multiple root layouts. See an example here. The root layout is a Server Component by default and can not be set to a Client Component.Migrating from the pages directory: The root layout replaces the _app.js and _document.js files. View the migration guide. Nesting LayoutsLayouts defined inside a folder (e.g. app/dashboard/layout.js) apply to specific route segments (e.g. acme.com/dashboard) and render when those segments are active. By default, layouts in the file hierarchy are nested, which means they wrap child layouts via their children prop. 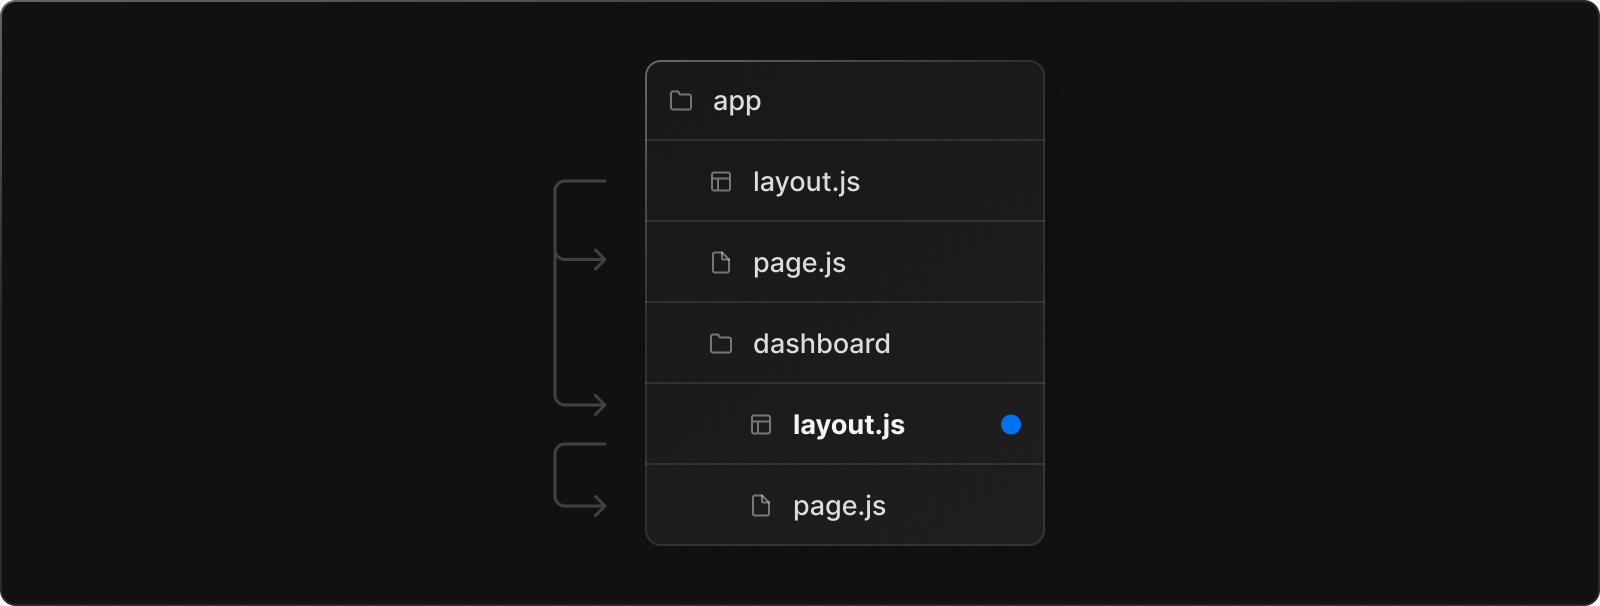 app/dashboard/layout.tsxexport default function DashboardLayout({
children,
}: {
children: React.ReactNode,
}) {
return {children};
}
app/dashboard/layout.tsxexport default function DashboardLayout({
children,
}: {
children: React.ReactNode,
}) {
return {children};
}
If you were to combine the two layouts above, the root layout (app/layout.js) would wrap the dashboard layout (app/dashboard/layout.js), which would wrap route segments inside app/dashboard/*. The two layouts would be nested as such: 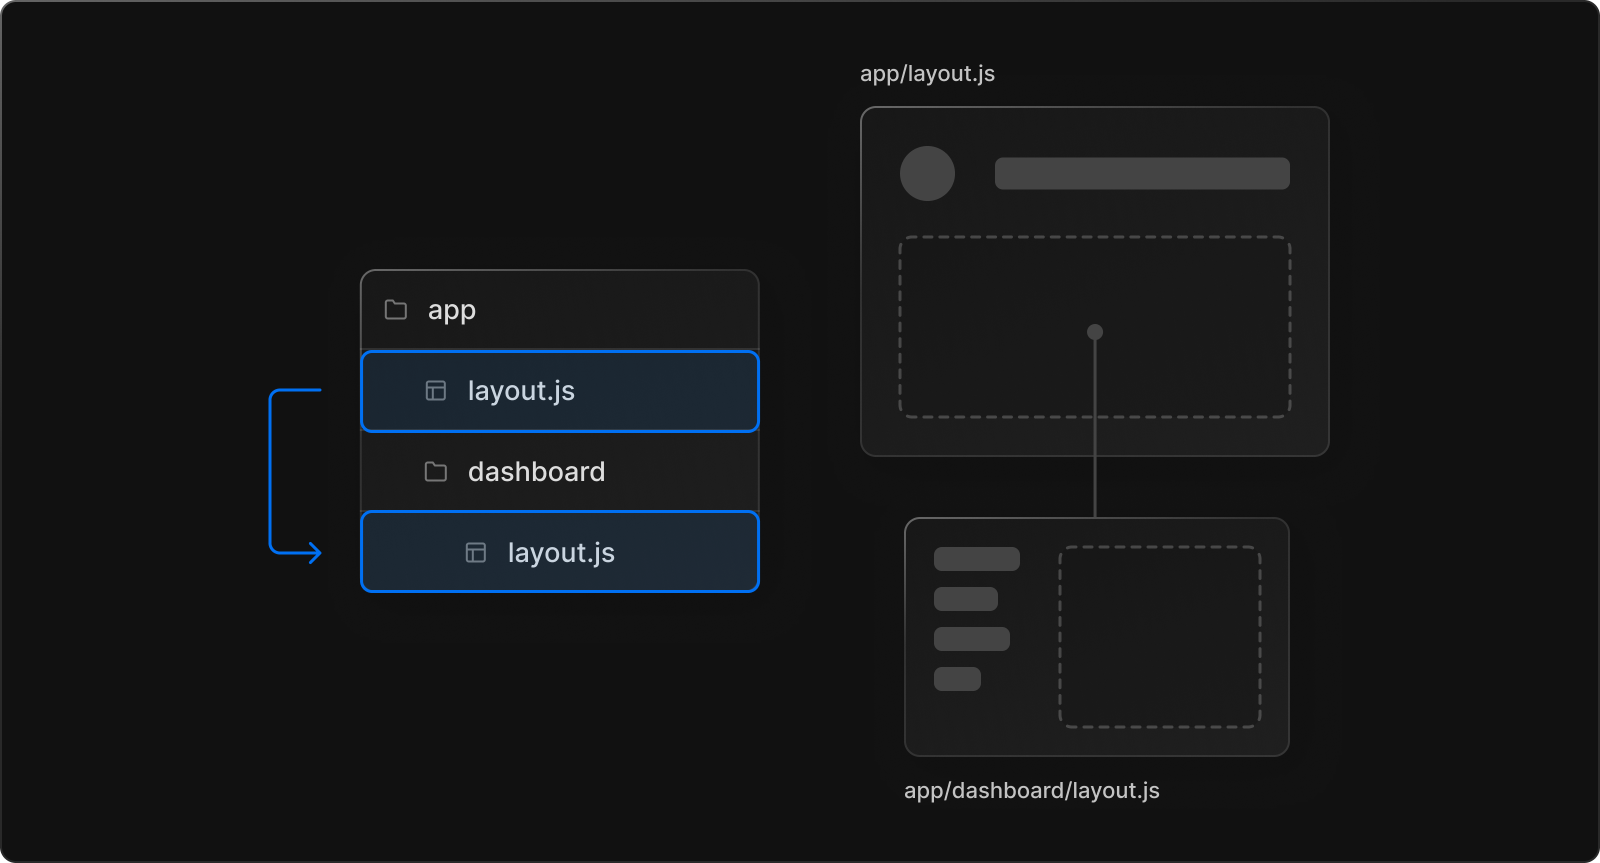
You can use Route Groups to opt specific route segments in and out of shared layouts. TemplatesTemplates are similar to layouts in that they wrap each child layout or page. Unlike layouts that persist across routes and maintain state, templates create a new instance for each of their children on navigation. This means that when a user navigates between routes that share a template, a new instance of the component is mounted, DOM elements are recreated, state is not preserved, and effects are re-synchronized. There may be cases where you need those specific behaviors, and templates would be a more suitable option than layouts. For example: Enter/exit animations using CSS or animation libraries. Features that rely on useEffect (e.g logging page views) and useState (e.g a per-page feedback form). To change the default framework behavior. For example, Suspense Boundaries inside layouts only show the fallback the first time the Layout is loaded and not when switching pages. For templates, the fallback is shown on each navigation.Recommendation: We recommend using Layouts unless you have a specific reason to use Template. A template can be defined by exporting a default React component from a template.js file. The component should accept a children prop which will be nested segments.  app/template.tsxexport default function Template({ children }: {
children: React.ReactNode
}) {
return {children};
}
app/template.tsxexport default function Template({ children }: {
children: React.ReactNode
}) {
return {children};
}
The rendered output of a route segment with a layout and a template will be as such: Output {/* Note that the template is given a unique key. */} {children} ModifyingIn the app directory, you can modify the HTML elements such as title and meta using the built-in SEO support. Metadata can be defined by exporting a metadata object or generateMetadata function in a layout.js or page.js file. app/page.tsxexport const metadata = { title: 'Next.js' }; export default function Page() { return '...' }Good to know: You should not manually add tags such as and to root layouts. Instead, you should use the Metadata API which automatically handles advanced requirements such as streaming and de-duplicating elements. Learn more about available metadata options in the API reference. Next Steps Linking and NavigatingLearn how to link and navigate between routes. layout.jsRequired and optional params for layout files. page.jsRequired and optional params for page files. template.jsRequired and optional params for template files. Metadata API ReferenceView all available options for the metadata object. |
【本文地址】